cool exercise)
10 Yoga Poses That Can Strengthen Your Back and Help You Get Rid of That Slouch
Having good posture can prevent headaches, improve circulation and digestion, and even increase the capacity of your lungs. Sitting incorrectly, slouching, hunching your shoulders, and bending your head down to look at your phone are the things that can ruin your posture. Luckily, there are some yoga poses that can help you make your back stronger.
We at Bright Side will definitely be practicing these poses daily. And we hope we’ll get good results!
1. Staff pose
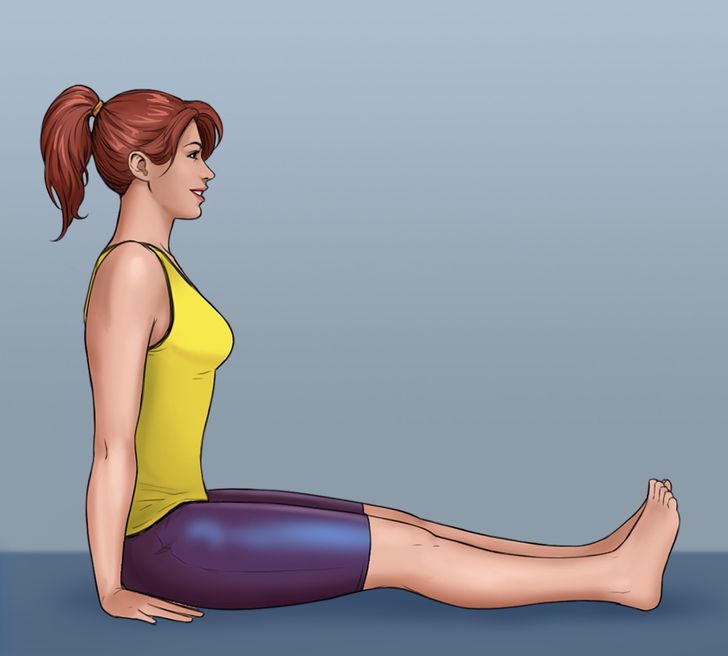
- Sit on the floor with your back straight and legs extended out in front of you.
- Place your arms next to your hips and roll your shoulders back and away from your ears. Try to place your whole palm flat to the floor and maybe even press against it.
- Keep your legs active, too, by flexing your feet and engaging your leg muscles.
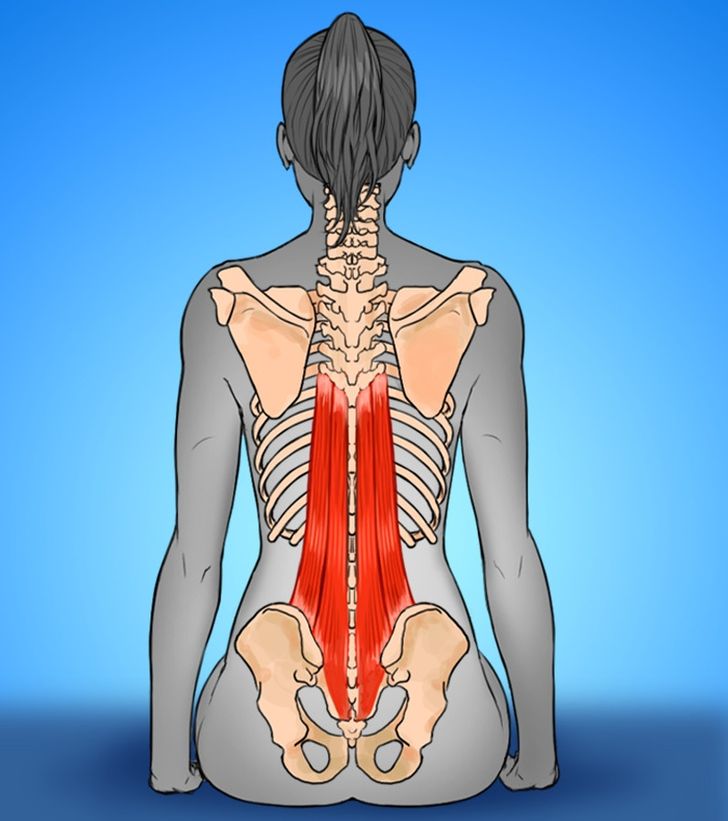
This pose might seem very easy, but the longer you stay in it, the harder it gets. If you can sit in this pose for 7 minutes, you will have a very strong back.
2. Low cobra
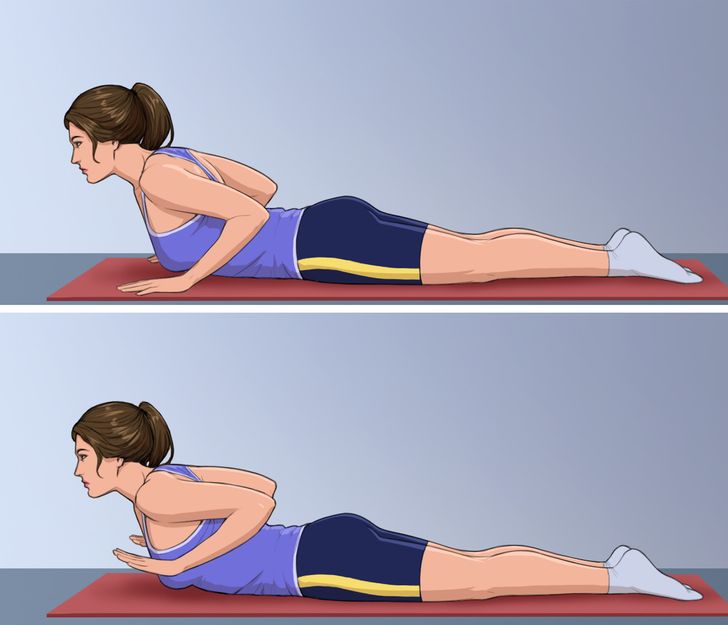
- Lie down on your belly, place your hands near your ribs, and draw your elbows in.
- Lift your chest up off the floor, but try to keep as little weight in your hands as possible. Instead, engage your back muscles.
- You can work with your breath, going up on the inhale and down on the exhale.
- Another variation of this pose would be to lift both your chest and your hands up off the floor. This way your back will be more active. Try to hold this pose for several in-and-out breaths.
3. Bow pose
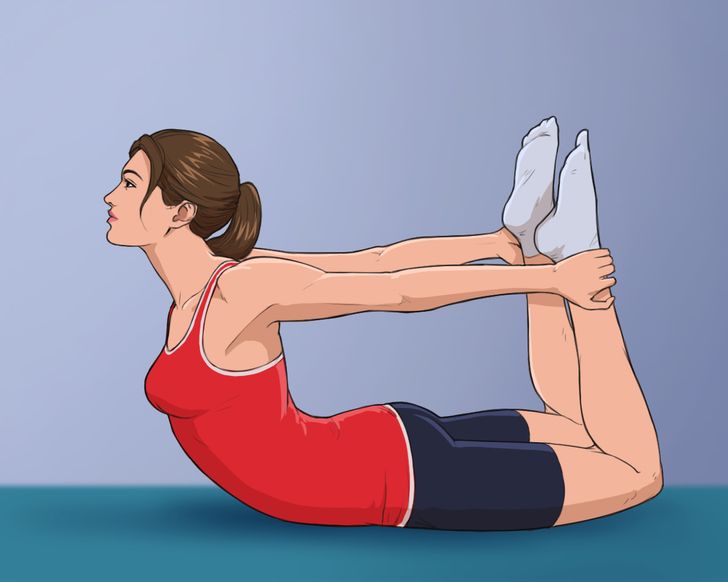
- Lie down on your stomach.
- Reach back for the outside part of your feet or ankles and grab them with your hands.
- Lift your chest and legs up off the floor. Try to keep your legs parallel to each other and in line with your hips.
- Also, press back with your feet to open up your shoulders. Hold this pose for a couple of breaths.
4. Reverse tabletop and reverse plank
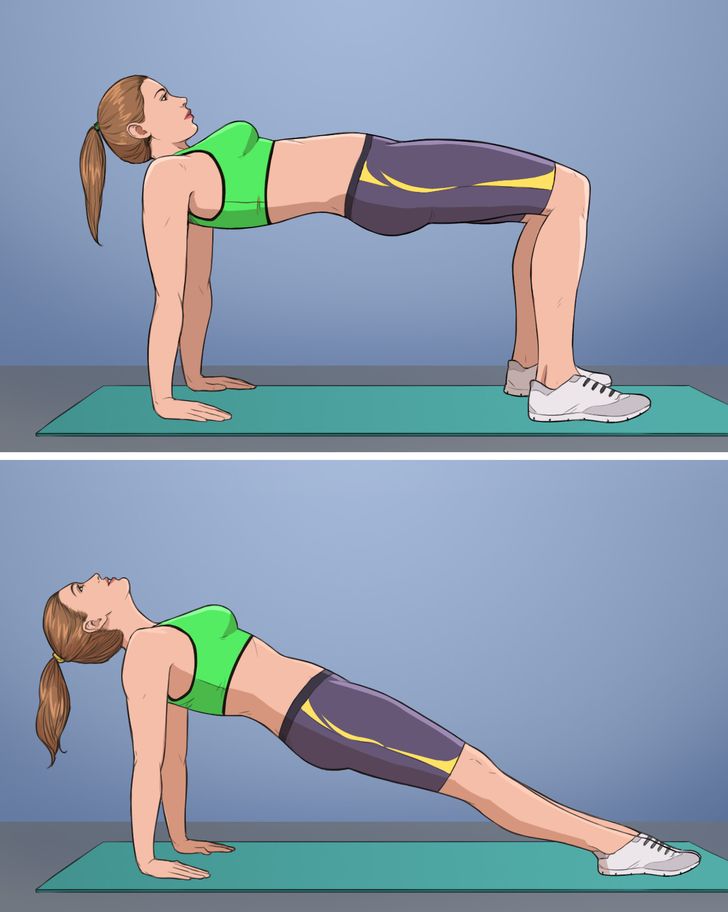
- Start in a sitting position.
- Put your wrists underneath your shoulders and place your feet in a way that when you lift your hips up, your knees will be right over your ankles.
- Lift your hips up, creating a 90° angle in your legs and your arms.
- For a more advanced version, try reverse plank. Start in a sitting position, with your wrists underneath your shoulders, and your legs extended out in front of you.
- Point your toes down toward the floor, and lift your hips up.
Reverse tabletop and reverse plank can help you strengthen your spine and open your shoulders.
5. Bridge pose
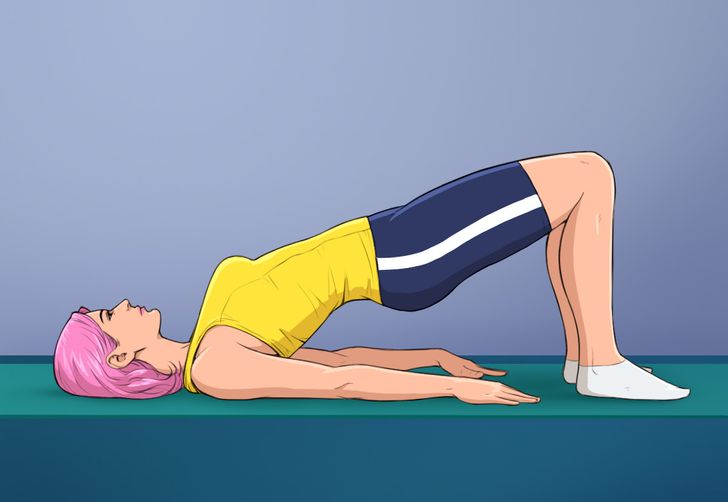
- Lay down on your back with the soles of your feet on the floor and your knees pointing up.
- Reach your hands down alongside your body. Your fingers should be touching your heels, but you can also place your feet a bit closer or further away.
- Press into your feet and lift your tailbone up. Keep your knees in line with your hips.
In bridge pose, we often use our glutes a lot. To make sure you’re strengthening your back, try to relax your glutes when you’re in the lifted position. That’s when you’ll feel the muscles of your lower back working. You can work with your breath, lifting up on the inhale, and coming down on the exhale, or hold this pose in the lifted position.
6. Locust pose
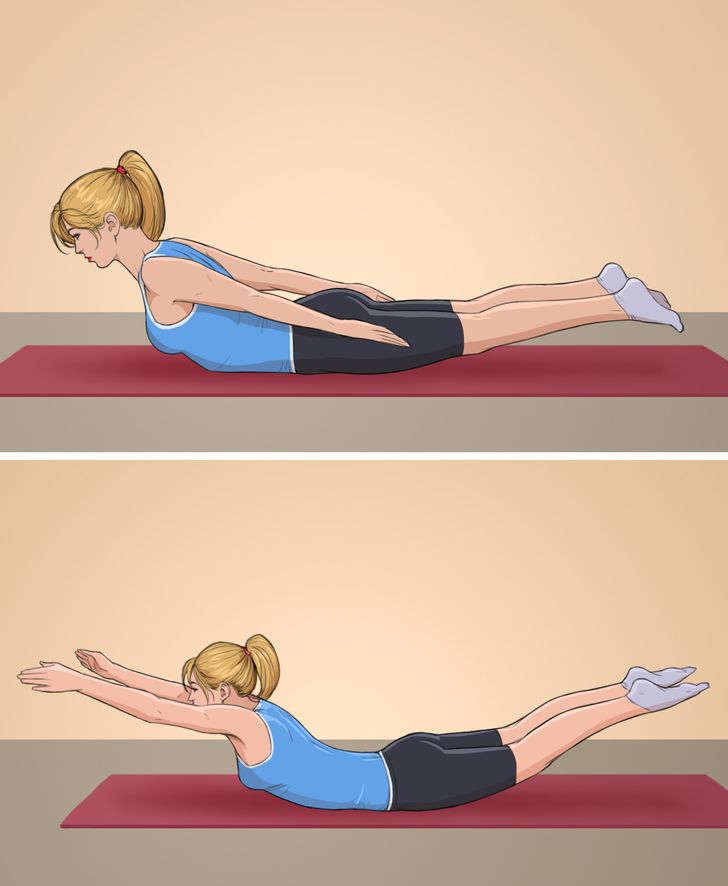
- Start lying on your stomach.
- Put your hands alongside your body with your hands reaching back toward your feet.
- Lift your chest, arms, and legs up. Try to lift them as high as possible.
- You can also reach your arms forward or spread them to the sides. Stay in this pose as long as you can.
7. Sphinx pose
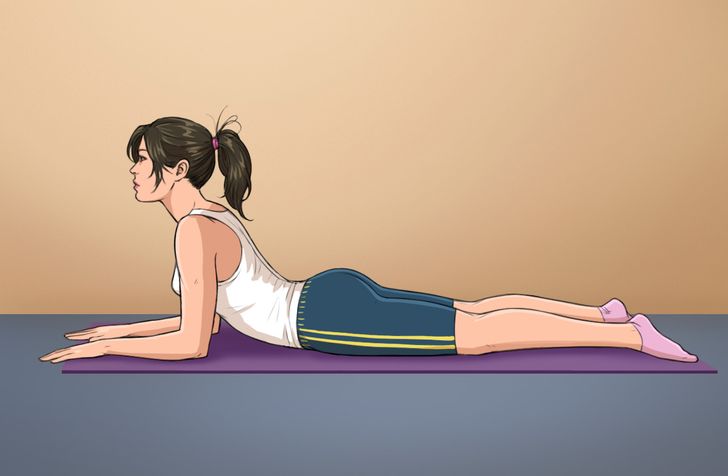
- Start lying on your stomach.
- Place your elbows right underneath your shoulders. Hands should be resting on the ground, parallel to each other.
- Draw your shoulders away from your ears.
- Lift your chest and press your hands down and back, toward your hips, as if you were going to drag your body forward.
- Keep your legs active, too, with your toes pressing against the floor.
8. Spinal balance
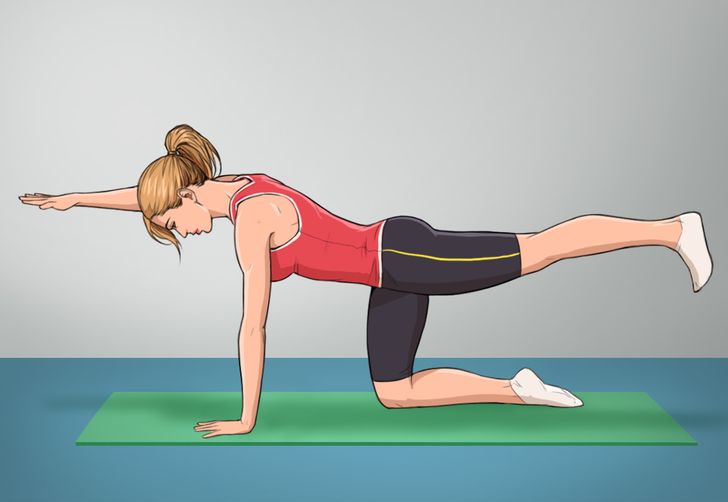
- Start in a tabletop position, with your wrists under your shoulders and your knees under your hips.
- Extend your right arm forward and your left leg back, keeping them parallel to the floor.
- Make sure your spine also stays in a neutral position and doesn’t arch.
- Hold this pose for several breaths and return to the tabletop position. Repeat with your left arm and right leg.
9. Chair pose
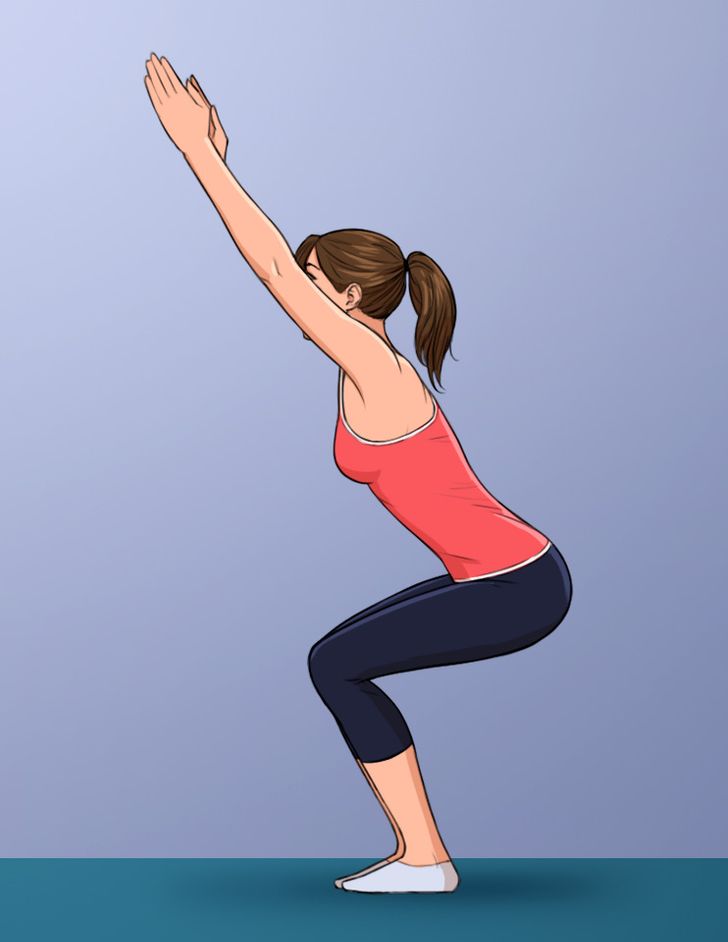
- Start by standing with your feet together or with a little bit of space in between them.
- Bend your knees as much as you can, but no lower than if you were sitting in a chair.
- Don’t let your back arch, with your tailbone sticking out and ribcage pushing out. Keep your spine in a straight line.
- Lift your arms up with your palms facing each other. The higher you lift your arms, the more of a stretch you will feel in your shoulders.
10. Halfway lift with arms lifted
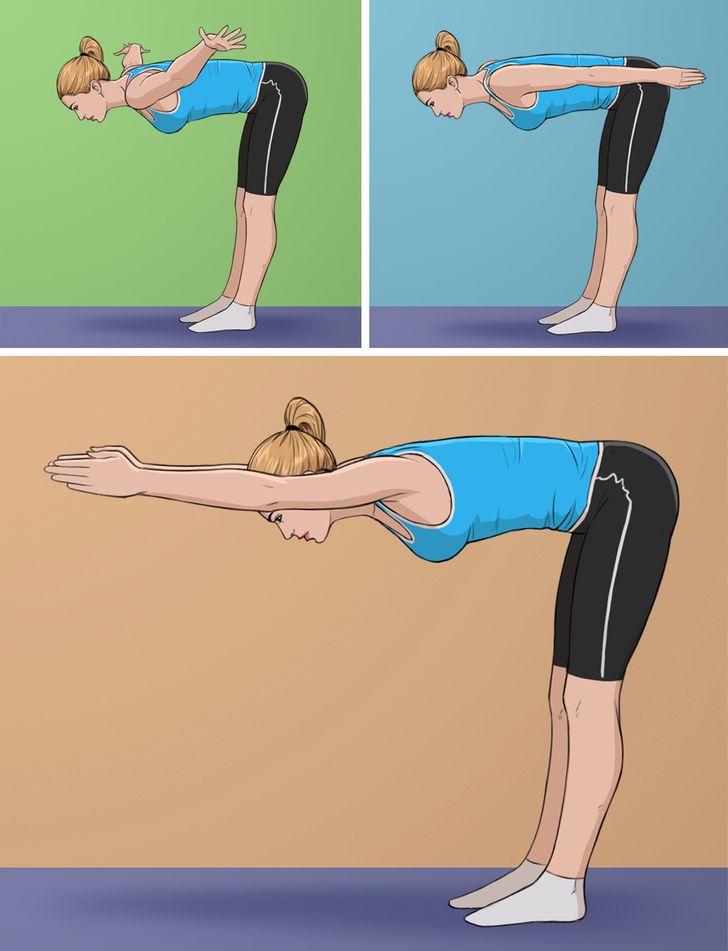
- Start in a halfway lift position.
- You can keep your legs straight or a little bit bent, but the important thing is to keep your back parallel to the floor.
- There are 3 arm variations you can try holding. You can spread your arms to the side, reach them back alongside the body rolling the shoulders back, or extend them forward. Make sure your arms also stay parallel to the floor.
Is slouching a problem for you? What other exercises help you with your posture?