14 People Who Should’ve Thought About Their Tattoos More Carefully
If you think that you can’t take photographs at all, it’s probably just because you don’t know a few simple tricks. Learn them, and you will never again have to say, “In reality, it looked much better!” when you show your photos to your relatives.
Bright Side has collected some tips that will help make your photographs much better.
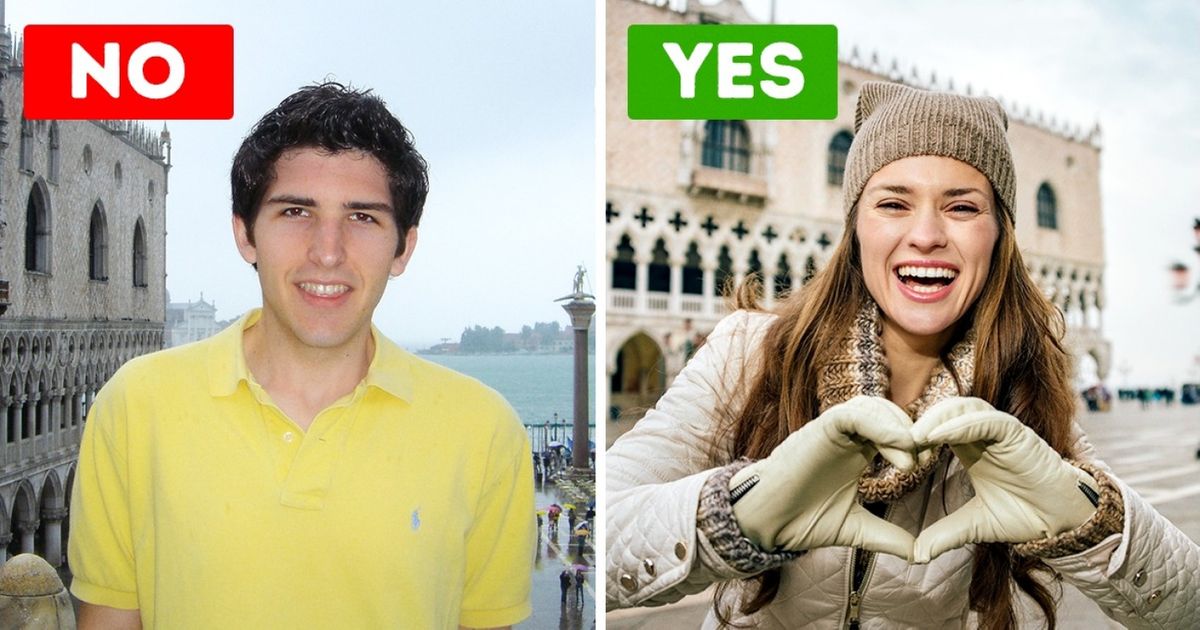
1. Let’s start with the most popular genre: the “I’m in front of this and that” photo. Everyone is super tired of such photos, but when you want a picture just for your memories, nothing else comes to mind. There is a way to do it successfully. When you are taking a picture of someone in front of a building or some beautiful greenery, the person should be the main focus. The building should be nothing more than the background. Or you can take a picture of the object, and your friend will be just a small silhouette. When you try to capture both, it will look like your friend was Photoshopped into the photo.
2. Photos without a story are empty, so make one up, and tell it using the photo. Instead of standing in front of the park with a “What am I doing here?” face, make your model sit on a bench and pretend to be thinking about something.
3. Shyness is the enemy of a good shot. Make the model smile, let them make faces, or let them do anything! Every photo must be alive. You can try to give the impression that a person didn’t know that their photo was being taken. Some people think that they are too cool to make faces for photos, but this is a mistake: look at the girl in the photo above! She looks alive!
4. Holding something in your hands can make you look natural and help you tell a story. Let your model make pictures in the sand, hold a backpack, or play with flowers.
5. In a model’s pose, there should be as few straight lines as possible. It’s great if your model crosses their legs.
6. People look much better in photos when they are sitting. This way it’s easier to relax.
7. There are a few more rules you shouldn’t break in order to get a decent photo of a person. Since you’ve decided to take a picture of someone, don’t cut off their head or other body parts. If you don’t need a photo of the entire body, don’t create lines through the knees. Look at the 3 photos above: the first photo looks wrong, and the other 2 look fine. The same goes for arms.
8. Leave some free space around the person, and don’t put them in a tight space. If your model is looking to the right, for example, and pointing their hand, leave more space on the right.
9. A built-in flash usually doesn’t help but actually stands in the way of good pictures (just remember overly lit faces with red eyes). We don’t recommend using flashes at all. The same goes for DSLR cameras. If you want to use them properly, you have to be a real photographer. Accept it.
10. There should be a main object in any photo. Otherwise, why are you taking it? For example, it’s hard to tell what the person was trying to say with the photo above. “A park!” is not the correct answer. You can capture a photo of a synagogue on a snowy street or a neighbor who went outside to smoke. In the photo below, we see that the main object is the person.
11. If you are taking pictures of nature or the city, we recommend adding people to your shot. People make photos come alive. Another good option is to take pictures of locals. But how do you do that without permission? Put your friend near the locals, and pretend to be taking a photo of him. Or pretend that you are listening to music in your headphones, and use your phone to take pictures.
12. Of course, you can take great pictures at any time of the day, but there are hours that make your photos way cooler. Photographers call them the “blue hour” and “golden hour.”
13. The blue hour is one hour before sunrise and one hour after sunset. It’s the time when the streetlights are not yet turned off or when you have just a few minutes before they are turned on. Human eyes don’t see anything special about this light — just some dull twilight. But photo cameras see things differently: you get photos that have a tender blue shade on them.
14. The golden hour is one hour after sunrise and one hour before sunset. At this time, the sun is very low over the horizon, and it makes everything seem kind of golden. Such soft light can make even the most ordinary street look different, let alone really beautiful places. Even portraits look much better at this time.
15. Professional photographers will laugh at us for giving such an obvious tip, but here it is anyway. Photos of cities at night look blurry, and here is why: to make a shot, a camera needs a “dose” of light. In the evening, there is little light, so a camera needs more time to receive sufficient light. So when you are taking a picture of someone in the evening, you should put your camera on something, fix it somehow, or at least lean against the wall, and tell your model to hold still for longer than usual.
16. There is a tip that everyone knows — don’t take pictures in front of direct sunlight. Break this rule. Photographers know about the power of contre-jour, which is when the light source is behind the model. It gives the silhouette of your model shine, it gives curious glares, and it makes photos feel freer. By the way, you can use contre-jour when shooting anything you want.
17. Look closely at puddles. You can use them to make interesting shots using the reflections of buildings and nature. Don’t be scared of sitting down and putting the camera very close to the water. If you have a rotating display, you are lucky.
18. Make experiments with the highest and lowest points of shooting. Don’t underestimate them. They can give you great variety.
19. Sometimes all you need to do to get a great shot is just wait. Wait until some tourists leave your area or some bright tram passes by. Don’t be scared of spending time looking for an idea and the right shot. It’s really worth it.
20. Some people want to make their photos brighter, so they use various filters. However, these make the shots very artificial. To make your photo look realistic, you need to keep the whites white. For example, the color of the pedestrian crossing sign.
21. Don’t underestimate photo-editing tools as they can really make a photo more interesting. And if Photoshop seems too complicated, you can use Adobe Lightroom. It’s great for fast photo-editing, and it’s really intuitive. This is why millions of photographers around the world love it very much. If you are a fan of taking photos with your smartphone, we recommend using VSCO and Snapseed.
22. Another useful tip: after you have finished editing your photo and are ready to save it, lower the intensity of all your effects by 30%. This will make your photo more natural.
Finally, here are 2 photos of the same place in Norway. What is the difference between the photos? No, it’s not different prices of cameras. First of all, the photographer spent some time walking around and finally found the right angle: you can see the mountains in the distance, the rock which is closer, and some houses. The rock is the main object of the photo, and the rest was just the background. He waited for the sun to light up the main object. And he finished by making the photo brighter in post-production.
Now all you need to do is practice. The more photos you take, the better.
Which of the tips seemed the most curious to you? Share your thoughts in the comment section below!


