The ABCs of American Sign Language — How to Teach Yourself or Anyone You Love

American Sign Language, or ASL, is considered a foreign language because it has its own vocabulary, grammar, word order, and style. It’s a way of communicating through gestures and hand movements, and while it’s the third most popular language in the US, there are around 6,000 different sign languages all across the world. We have a fun and easy way for you to get familiar with all the letters, from A to Z, and it’s easy as 1-2-3. Make sure to take a peek at our bonus section for something special we’ve prepared for you.
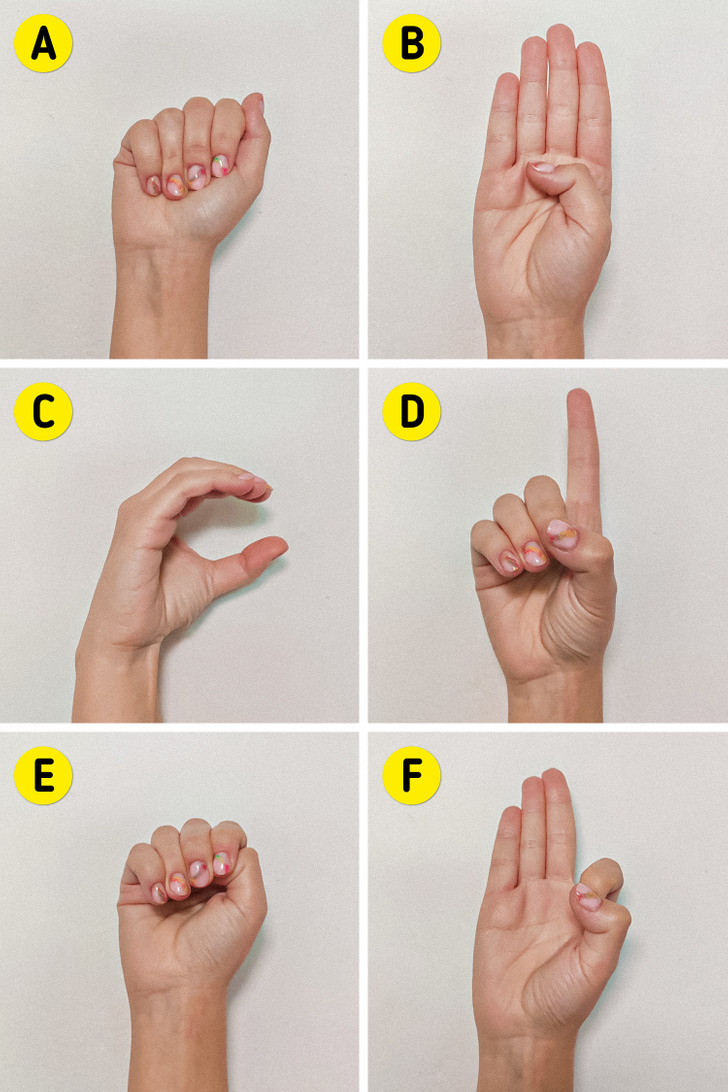
  • Letter A: Make a fist with your thumb on the side, resting on your index finger. It should look like a lowercase “a.”
  • Letter B: Make a flat hand with your thumb across your palm.
  • Letter C: Curl your thumb and fingers into a half-circle or a “C” shape.
  • Letter D: Join your fingertips and thumb and point your index finger up.
  • Letter E: Tuck your thumb into your palm and fold your 4 fingers on top of it.
  • Letter F: Press your thumb and index fingers together and keep the other 3 upright — like making the sign for “okay.”
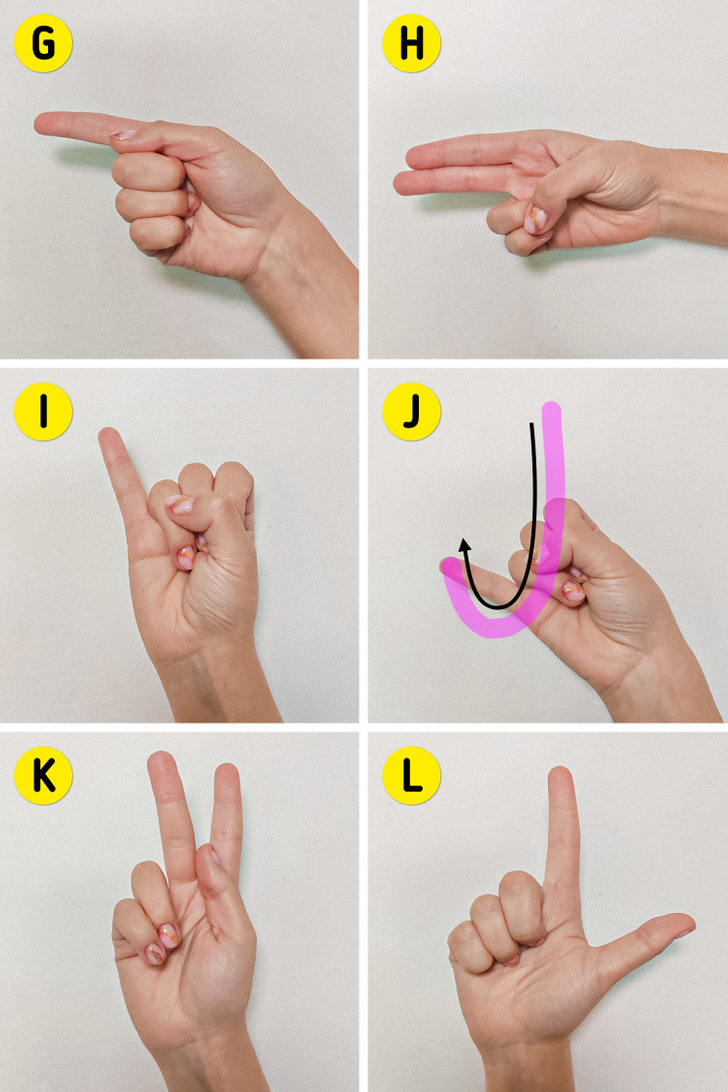
  • Letter G: Point toward something using only your index finger, while resting your thumb on your other fingers.
  • Letter H: Point with your index and middle fingers, and place your thumb over the remaining fingers.
  • Letter I: Form a fist and raise your pinky finger upright.
  • Letter J: Form a fist and raise your pinky upright, then move your hand downward and turn to the left, making an imaginary “J” in the air.
  • Letter K: Raise and spread your index and middle fingers in the shape of the letter V, then place your thumb into your palm, so its tip lies between the 2 pointed fingers.
  • Letter L: Make an “L” shape with your thumb and index fingers.
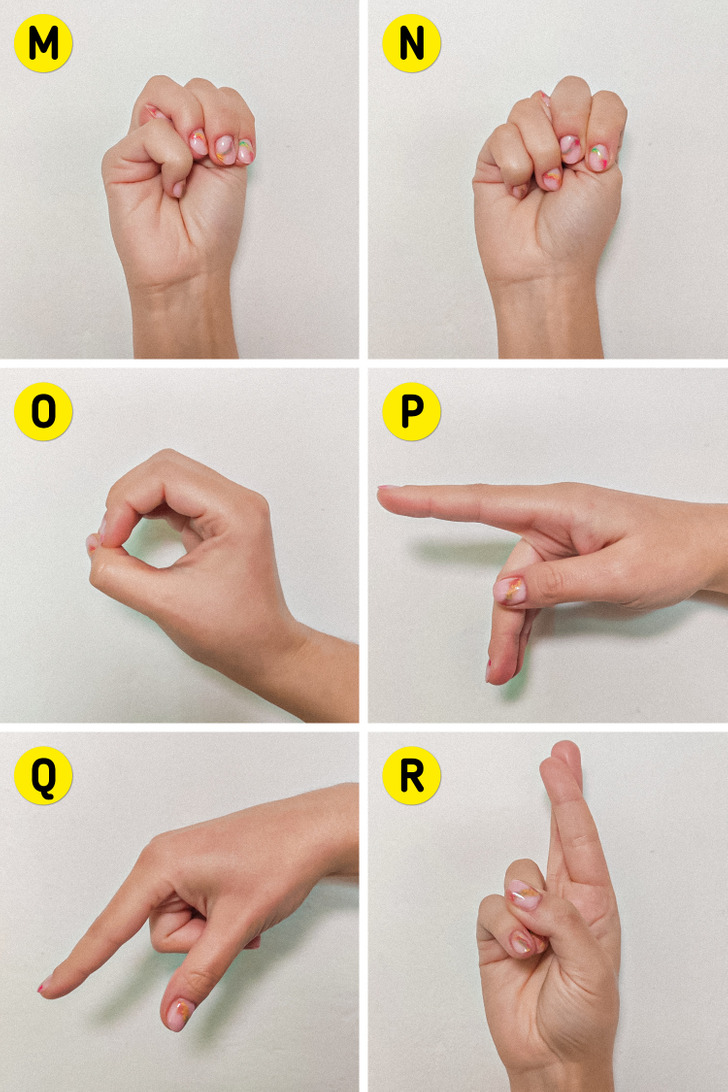
  • Letter M: Close your fist and place your thumb between your pinky and ring finger.
  • Letter N: Close your fist and place your thumb between your ring and middle finger.
  • Letter O: Join the tips of your fingers and thumb together.
  • Letter P: Point your index finger forward and your other fingers downward, then rest your thumb on your middle finger.
  • Letter Q: Hold down your dominant hand, placing your index finger and thumb parallel to each other, while keeping your index, middle, and pinky fingers curled in.
  • Letter R: Point your index and middle fingers up, resting one around the other, and curl the other fingers in.
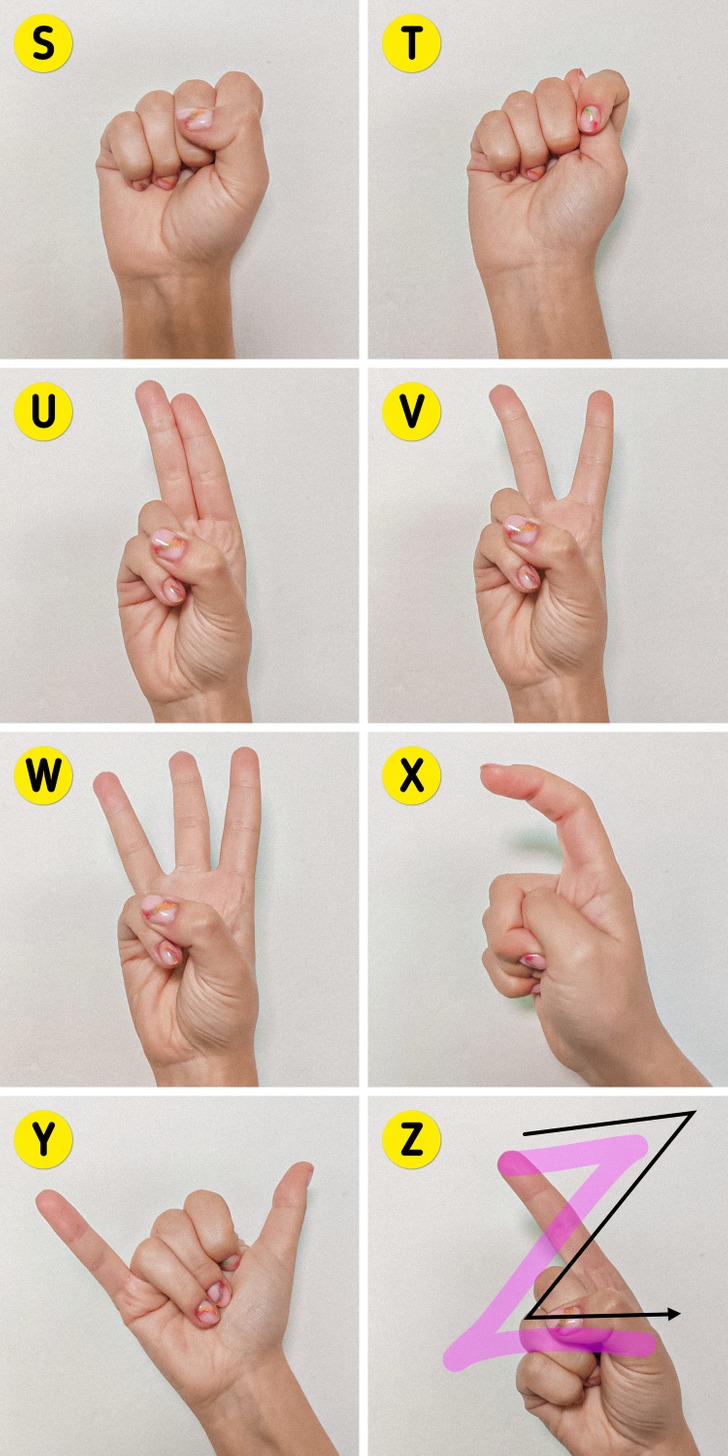
  • Letter S: Make a fist and fold your thumb in front of your fingers.
  • Letter T: Make a fist and tuck your thumb between your index and middle fingers.
  • Letter U: Hold your hand in a fist while the index and middle fingers are pointed up, sticking together.
  • Letter V: This is the same as the letter “U,” but split your index and middle fingers into a “V” shape.
  • Letter W: Spread your index, middle, and ring fingers, pointing up, and place your thumb on your pinky.
  • Letter X: Tuck your thumb under your middle, ring, and pinky fingers, and gently curl your index finger halfway.
  • Letter Y: Hold your pinky and thumb up, while tucking in the other fingers.
  • Letter Z: Point upward with your index finger and wave it to draw the shape of the letter “Z.”

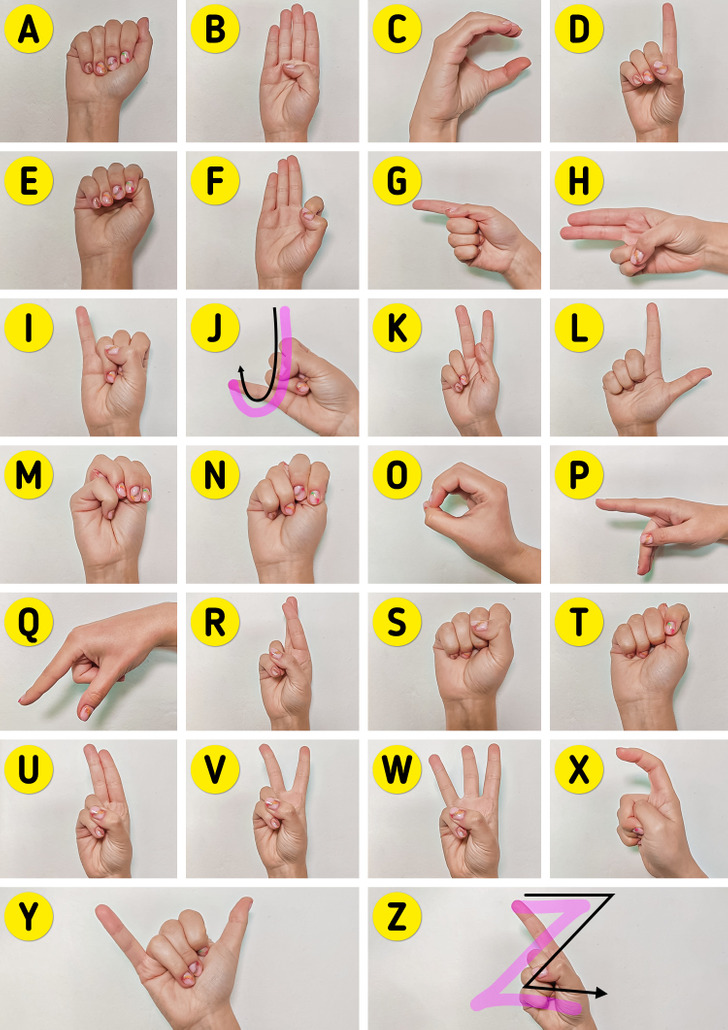
Bonus: your own printable version of the American Sign Language alphabet

  • Download and print it on an A4 sheet of paper, and you’ve got yourself a guide you can frame or take anywhere with you! After all, you never know when you or anyone else might be in need of one.

Comments

Get notifications
Lucky you! This thread is empty,
which means you've got dibs on the first comment.
Go for it!

Related Reads